How to Migrate OS to SSD using EaseUS Partition Master
How to Migrate OS to SSD using EaseUS Partition Master - EaseUS Partition Master software is a software released by EaseUS and is helpful for the management of storage systems on our computers. We can easily set up storage partitions on our computers, change the MBR or GPT format of our HDDs, and move the operating system to a new storage area, just like the SSD we will do today.
 |
| How to Migrate OS to SSD using EaseUS Partition Master |
How to Migrate OS to SSD using EaseUS Partition Master
How to Use EaseUS Partition Master to Move OS to SSD
Once the SSD is installed and detected in Disk Management on your computer, you can migrate by running the steps below:
1. Buka aplikasi EaseUS Partition Master.
2. Automatically, when the application opens, you will be directly directed to the OS migration menu. But if nothing appears, you can click the migrate OS button.
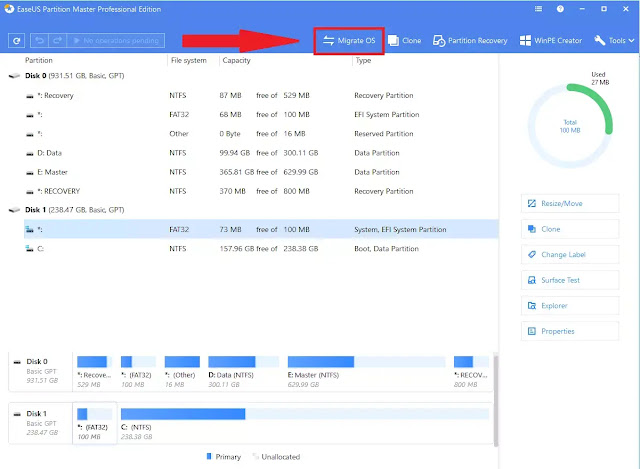 |
| Click Migrate OS |
3. Next, select the OS storage and OS migration target (SSD), click next and proceed.
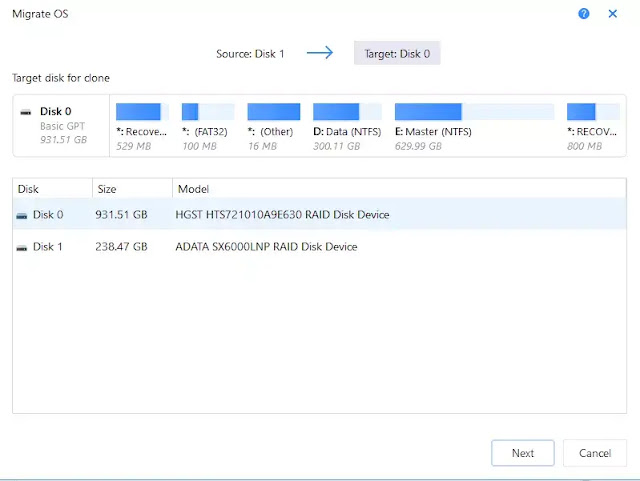 |
| Choose SSD as a target to migrate the OS |
4. Next, EaseUS will do the process of moving the OS to SSD. It may take about 10-20 minutes (or even more) to complete moving the OS to an SSD (depending on the specification of each computer).
5. After the process is complete, click the Finish button, and exit the EaseUS application.
6. Restart your computer and immediately log into the BIOS. Set the boot priority on your BIOS to an SSD to boot the OS using an SSD.
7. If the computer successfully boots using an SSD, you can delete your OS files in the old storage area to not meet the storage system.
That's all a tutorial on How to Migrate OS to SSD using EaseUS Partition Master. I hope you can find this tutorial helpful. Thank you for reading.